Attested API
The Attested API example demonstrates how to make signed messages accessible via API. The template is available in Go, Python, Rust, and Typescript.
Overview
The Attested API example packages a minimal containerized service that:
- Runs inside an EigenCompute Trusted Execution Environment (TEE).
- Generates a random value inside the enclave.
- Constructs a verifiable message including randomness and timestamp.
- Signs the message using an address derived from the TEE mnemonic.
- Exposes the result through a
/randomHTTP endpoint.
What you get
When deployed, the example provides a REST endpoint returning:
- A TEE-generated random number
- The message string
- The message hash
- A signature generated inside the TEE
- The signer address.
To deploy and use the Attested API example
What you'll do:
- Build and deploy the Attested API application.
- Request a signed message from the application.
- Verify the signed message was returned from the application TEE.
Prerequisites
Before you begin, ensure you have:
- Docker - To package and publish application images.
- Sepolia Testnet ETH - For deployment transactions.
- Installed EigenX CLI and authenticated to EigenCompute.
- Subscribed to EigenCompute.
1. Create Application from Attested API template
Docker Login
Ensure Docker is running and log in to your Docker registry:
docker login
You must be logged into Docker to push the application image.
Create app from Attested API template
Create an app:
eigenx app create
Enter a name for your app and select language:
? Enter project name: myproject
? Select language: typescript
Select attested-api:
? Select template:  [Use arrows to move, type to filter]
> attested-api: TypeScript API that generates cryptographically attested random numbers
The project is created:
2025/11/21 11:30:48
2025/11/21 11:30:48 Cloning template: https://github.com/Layr-Labs/eigenx-templates → extracting templates/attested-api/typescript
2025/11/21 11:30:48
2025/11/21 11:30:50 [====================] 100% eigenx-templates (Cloning from ref: main)
2025/11/21 11:30:50
2025/11/21 11:30:50 Template extraction complete: templates/attested-api/typescript
2025/11/21 11:30:50
Successfully created typescript project: myproject
Change into project directory:
cd myproject
Build and deploy
Build and deploy the example application:
eigenx app deploy
Deployment options are displayed. Select the default deployment method to build from Dockerfile:
Found Dockerfile in current directory.
? Choose deployment method: Build and deploy from Dockerfile

📦 Build & Push Configuration
Your Docker image will be built and pushed to a registry
so that EigenX can pull and run it in the TEE.
Select the default image reference:
? Enter image reference: <yourusername>/typescript:latest
Enter an application name:
App name selection:
? Enter app name: <yourapplicationname>
Select Continue without env file:
Environment file not found.
Environment files contain variables like RPC_URL, etc.
? Choose an option: Continue without env file
Select the default instance type and logs option:
Select instance type:
? Choose instance: g1-standard-4t - 4 vCPUs, 16 GB memory, TDX (default)
? Do you want to view your app's logs? Yes, but only viewable by app and platform admins
The CLI:
- Builds the Docker image targeting
linux/amd64. - Pushes the image to your Docker registry.
- Deploys to a TEE instance.
- Returns the application details including app ID and instance IP. You will see the Refreshing timer running while the app is being started.
2025/11/11 10:54:58 Status changed: Deploying → Running
2025/11/11 10:54:58 IP assigned: 34.82.182.235

2025/11/11 10:54:58 App is now running with IP: 34.82.182.235
4. Request signed message
View the application information:
eigenx app info
The application information is displayed:
2025/11/11 12:05:38 App Name: AppName
2025/11/11 12:05:38 App ID: 0x1Fe4a6FedF45071c45aE779756d79E463E590d28
2025/11/11 12:05:38 Latest Release Time: 2025-11-11 10:54:12
2025/11/11 12:05:38 Status: Running
2025/11/11 12:05:38 Instance: g1-standard-4t
2025/11/11 12:05:38 IP: 34.82.182.235
2025/11/11 12:05:38 EVM Address: 0x17c66C17F03899daD0cBab3A7Fc5EA89B37dcD52 (path: m/44'/60'/0'/0/0)
2025/11/11 12:05:38 Solana Address: G3QYTKnA5PmsQGyPN2xW83RsiUXm2Zsp2eN3y3tfAMsF (path: m/44'/501'/0'/0')
Use the Attested API to request a signed message containing a random number and attestation for that random number:
curl http://<yourApplicationIP>:8080/random
The API response is displayed.
{"randomNumber":"0xdf9aac2b3d24f016069f60b80f9eb6078af53a75e003efccb3d9a701398e1f2e","randomNumberDecimal":"101139047948132875594643189998571798010250255951109269318072821531194929585966","timestamp":"2025-11-10T06:11:14.025Z","message":"RandomnessBeacon|0xdf9aac2b3d24f016069f60b80f9eb6078af53a75e003efccb3d9a701398e1f2e|2025-11-10T06:11:14.025Z","messageHash":"0x8fb10cc1c2b7e200f748df0caa61342328eda3220ee8943f6cf87a8b6e06922f","signature":"0x65fef0640e256497f9276565a662f568a2569003f83ab5c1b717d8a47b6d9347064ef9fd28df568bc18d343cf7505b77fae788818d7251c8d6da6f6d6a74f17f1b","signer":"0x17c66C17F03899daD0cBab3A7Fc5EA89B37dcD52"}
5. Verify the signed message
Click the Verify Signature button available on Etherscan. The Verify Signature window is displayed.
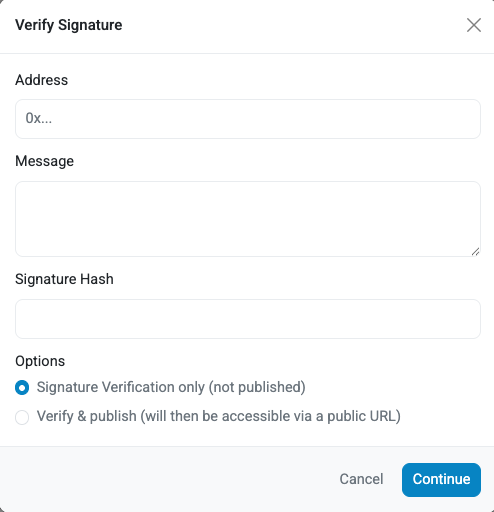
From the API response, enter:
signerin the Address field. Thesigneris a signing addresses derived from the TEE mnemonic.messagein the Message field.signaturein the Signature Hash field.
Click the Verify button. The Signature Verification window is displayed and indicates the message signature was verified.
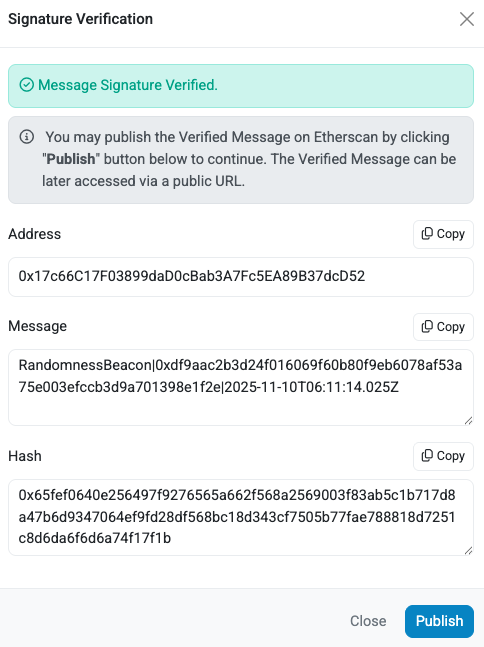
The signature verification verifies that message was signed by the signer in the response.
To verify the signer is one of the signing addresses derived from the TEE mnemonic, use the Verifiability Dashboard
(Mainnet and Sepolia Testnet) to confirm the
signing address is one of the Derived Addresses displayed for the application.